I found the most darling jewelry box at the Thrift Store. I almost put it back because it was $5.97 and I thought that was too much considering the state it was in. It had nail polish on it and the store had put packing tape all around it so I couldn't see what it was like on the inside. Things that are closed apparently intrigue me because I bought it.
That's not where nail polish goes, kid!
They scribbled on the back too but the sides are okay.
What an awesome surprise the insides were! I didn't even realize that the top could open as well. I've never seen a box with rounded cubby holes like this. The sides can fold all the way back so they are flush to the box.
I got out my body type models to test the scale!
Fashionista Claudia can reach the top section, no problem.
Monster Rae can just see the top of her head but cant reach inside.
Uh, don't do that, Bratz Carmen. Please get down.
I think it's workable with any size. I'll just keep the top closed for small dolls and open it for bigger ones. Maybe all the Barbie pink is rubbing off on me because I quite like the color of this. My painting skills are horrendous, but I was able to refinish it without removing the original design.
Lookit! It even goes well with the Barbie sofa. Sweet!
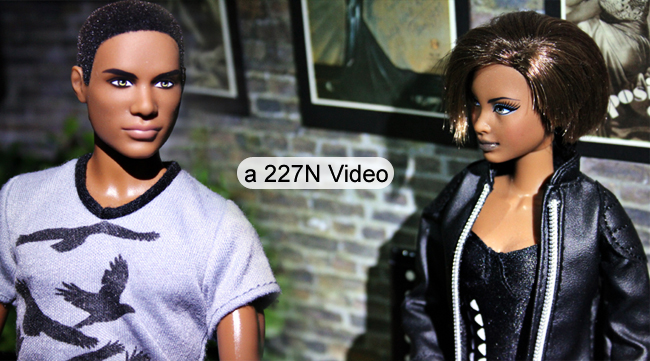
Video dialog so international readers can translate:
Night has fallen at 227N Place as Tasha makes her way home. Walking up the cobblestones Tasha is startled to see an unwelcome visitor.
"Jay." Her heart sank. What are you doing here?"
"You've been ignoring my calls, Tash. Don't you think we should..."
"Stop. We're done, Jay. You should leave."
He reaches out to her. "One second. Just give me one second. Please."
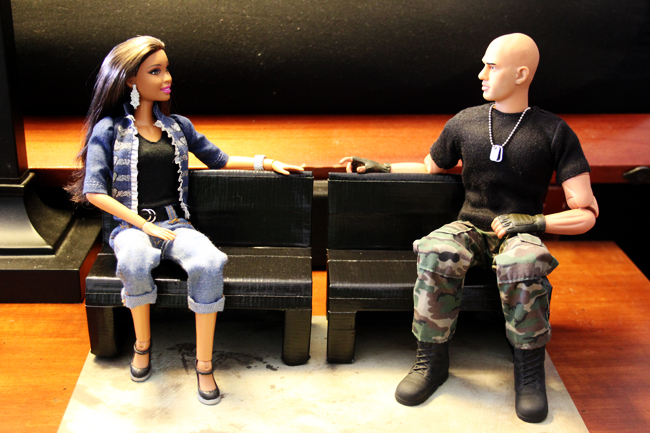
Tasha's eyes cut to the hand on her shoulder and that's when she notices there's an audience to this encounter. "Over here." Tasha walks toward the benches.
Jay begins to plead his case. "Look, I made a little mistake."
Tasha scoffs at his words.
"Okay," Jay admits, "a huge one. I know I was wrong but can't we get past it? That girl meant nothing to me!"
"She meant something to me and no, we can't. It's been months, Jay. You need to move on - because I have."
"Yeah, I know - with Kevin!"
"How did you...?"
"That's just sick, Tash. C'mon, he's your kin!"
"Oh, get over yourself! You know we aren't related by blood."
"Your parents are still married aren't they? A step-brother is still family! I can imagine how your folks feel about this."
Tasha sighs and looks away.
"Oh, my God. They don't know do they?"
"That doesn't concern you! Just mind your business, alright." Tasha stands up to leave. "Enough of this. You just stay out of my life."
"You can't mean that. Let's talk this out."
"We're done talking. Move."
A moment passes as he stands there regarding her. "Don't regret it, Tash." He steps aside and motions that the way is clear.
"Don't come back, Jay." [Tasha goes inside]
"That guy has got you twisted. Maybe it's time I make it my business."
________________________
Behind the Scenes:
This is my first full on photo story and my first video. Once again, Jay was the catalyst in getting me to try something when he asked to see a night time shot of my Urban Dwelling. I was having fun and taking so many photos, I thought, "Dang, this sure is a lot of photos. I know... I should put them in a video!" And so I did, lol.
I had already moved the development when he asked for a night shoot so the location and configuration of it had changed. It's sitting on top of a bed so that's why it looks slanted in some areas because it's no longer on a completely flat surface.
The park is now gone and all the buildings are separated. So, instead of a multi dwelling house it's more of a community complex with intersecting walkways. The clip lights on top are used as spotlights because the few that are intended to be visible can't really light the space.
With all the overhead lights turned off and me holding a clip light in my hand, this is what you get. The shoot took two nights but surprisingly, those little Dollar Tree and BigLots lights stayed lit. I totally faked the illumination in the smaller solar lights because they haven't been outside to be recharged.
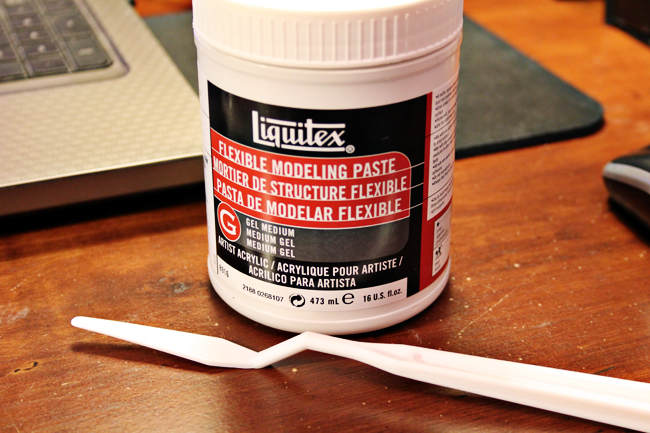
In my Flock Your Cornrows post I said you could use flexible modeling paste to hide the rooting holes in a dolls head. However, you can also use it to fashion hair and close the lips of a smiling doll.
Modeling Paste, also sold as "molding paste," has a wet consistency that isn't as dense in its original form as clay or putty. Many people use it in conjunction with stenciling reliefs, smoothing canvas or as a building surface that can be carved, sculpted or sanded once hardened.
If you just wanted to cover rooting holes you could smooth the paste over the head with your finger (I always use gloves) or scrape it on with a metal or plastic palette knife. If you want a crisp hair line then use masking tape to define the areas you don't want affected and remove the tape immediately after applying your paste.
For my purposes I've used my palette knife to pat on a thin layer of paste and let it dry for about 30 minutes. I didn't smooth it because I wanted a tacky layer for the next one to adhere to. I'm going for an afro-centric look, so the more texture the better.
My second coat is thicker and I'm more uniform in the peaks and pulls that I'm making with the paste. I also added a layer to the lip opening, let it dry 15 minutes and then applied a second coat that I shaped into a closed mouth.
Once the paste hardened completely (about 4 hours in the humidity of Florida), I applied a single layer of black paint. You could now put on some glue and flock for a cool effect but I'm leaving mine alone.
I've actually built lips on top of her existing ones, covering them completely. I used a tooth pick to make the crease in her mouth while the paste was still pliable. Not all dolls have such wide open smiles as Nikki does so you can get away with simply filling the opening. However, I wanted to show you the possibilities.
I sanded the bottom lip to make it smooth, but left the top one rough so you can see the difference for those of you who want to make some Jolie type lips. I filled the entire cavity of her mouth, side to side, but you don't have to.
A special note:
This will be the last procedure that my hardworking practice model will undergo. She is officially retired. A complete trooper through so many faces, applications and experiments, she will now be enjoying her dolldom test free. Thank you for your service, Nikki No. 3, thank you.
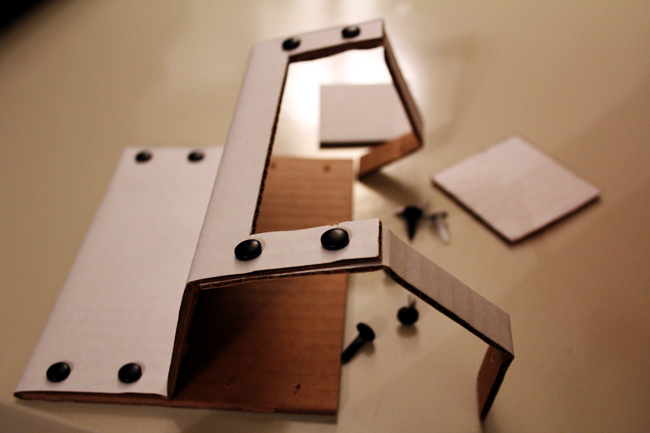
I decided to do this because I got a box from an office supply store that was the exact size as the one I used to make the entryway for my previous house. I cut along the red lines to split the box in half.
The old entryway had its top cut off, but I left it on the new ones so they would be more sturdy. Besides, I had no idea what I was doing last time, but now I do!
I recycled the red poster board from the old house and taped it to one corner of each box. I want the scrapbook paper I bought to last awhile so I'm putting it in place using HandiTak ($1.50 BigLots). I don't recommend HandiTak because it leaves a stain and that's why I put some tape on the back of the paper first. The back of the boxes are clipped together with binder clips.
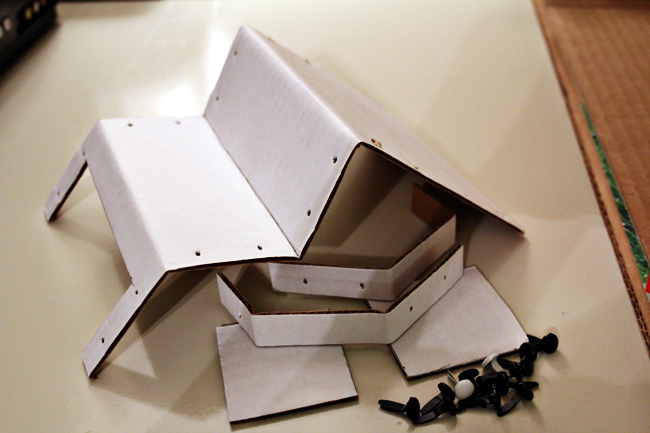
This is the basic structure and the two types of paper I'll be using; brick and grass from Joann's. This doesn't have to be the only configuration. Put all the boxes side-by-side, change the entry door, remove the stairs and you've got a business front. Stack them on top of one another and you've got a triplex. Endless possibilities!
Add some foliage, furniture and accessories and you've got a freakin' urban development. Before I go any further, a big, HUGE shout out to Jewel Snake for giving me the idea to use a solar light to fashion my street lamp. Excellent suggestion!
So, let's take a tour, shall we?
All the small foliage is from Michaels. The green table bottom and colored lights are from LIV. The white table top is from the Friends Boutique. The base of the street light is an old desk lamp and the solar light is from Walmart. The little side table is from Just Dreamz. The entry door lights are from Big Lots. The stairs and black fence are Tech Deck. I made the chairs, benches and windows.
And now some scale photos:
And there you have it. Another dwelling designed by Muff. Cardboard and paper, man. That's some awesome stuff.
I took advantage of the 40% off sale that Michael's is having on the Ashland Garden Collection. I do, of course, have foliage from Dollar Tree but the Ashland stuff is a denser, higher quality and so much of it lends to 1/6 scale. I'm trying to make a nice little park or commons area for my new exterior housing project and I need some benches. I have the one [wooden bench] I made but wanted to try crafting some with cardboard since it would be quicker.
I took the top off a banker's box and cut two 5½ inch strips off it. Then I marked down 2¼ inches five times and folded three of the sections. I could have left it alone, but I had to get all fancy and cut an opening out of the lower panel. This then required two side panels to keep the legs stationary. I totally created more work for myself than necessary but I do prefer the design I achieved.
I always intended to add the embellishments and use them to secure the benches, but in the end I felt they were too big for such a small bench. I also thought I could get away with not covering them with anything since the top of the box was white. However, it just looked like a folded cardboard box so I decided to cover them with tape and not put on any embellishments.
Spacious for one
Comfy for two
Eh, they are okay. Better than no benches, lol. They are fairly sturdy and if I poke the side panels out I can store them flat and flat storage is always a goal for me. They really could stand some glamming up or maybe an advertisement on them. We'll see.
I was on my way to Panda Express to get some Kung Pao when my spidey sense went off that I needed to go to Toys R Us ASAP. I always listen to that tingle and I'm rarely disappointed. Today was no exception.
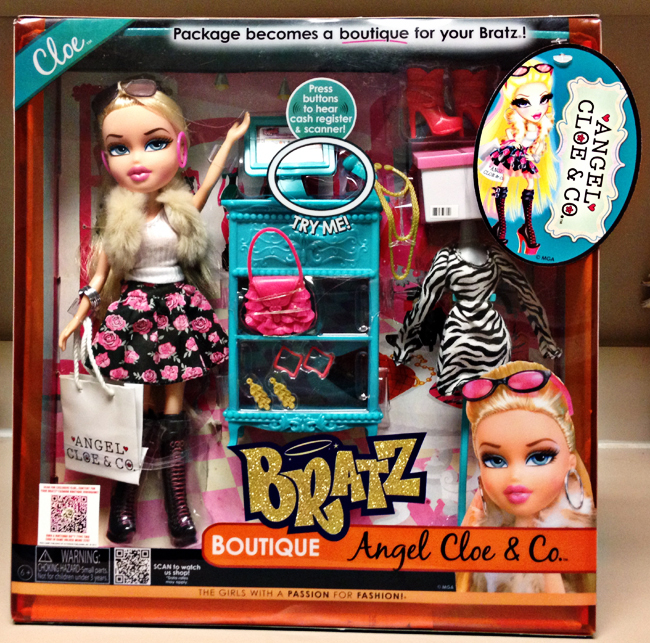
Bratz Boutique, Catz and True Hope lines were all on clearance for $9.98! While that's a good deal on dolls that used to be $19.99 (Catz) and $14.99 (Hope), it's an EXCELLENT deal on a set that used to be $26.99. That's 63% off! *dances* Although they had the Yasmin and Sasha versions, I only got Cloe.
Front of box
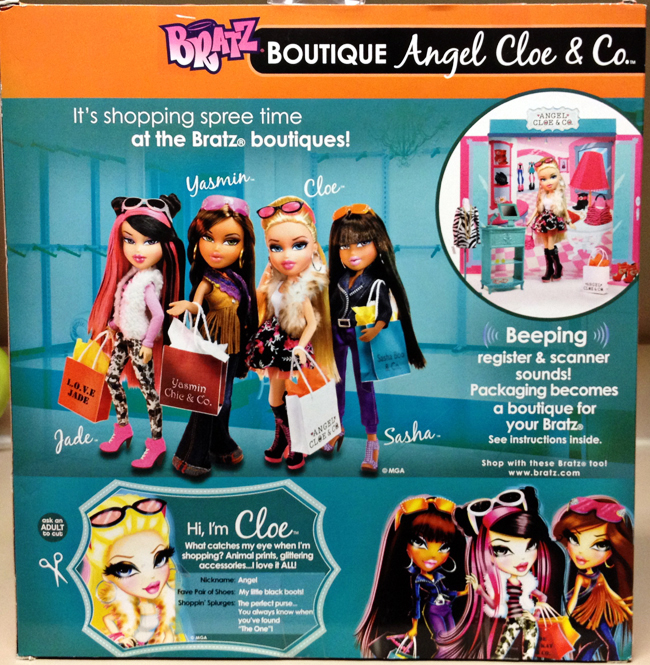
Back of box
Removed from exterior box and side panels extended
Insert removed from backdrop box
A Barbie can fit inside the backdrop. However, once she has shoes on she'll be too snug to walk under the sign. I was away from home when I took these photos. It's not weird that I carry a nekkid doll in my bag so I can test the scale of things no matter where I am, is it? Nah, of course it's not weird! *cough cough*
Anyway back to the Boutique:
Extra fashion and mannequin
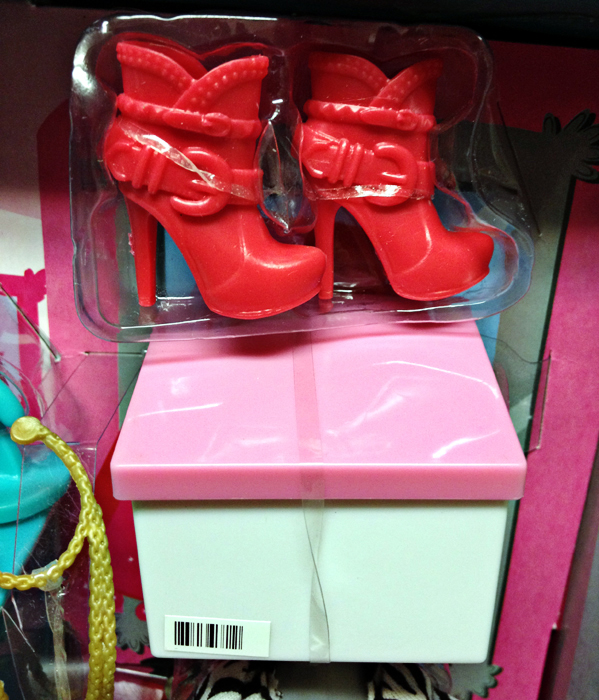
Boots and a shoe box.
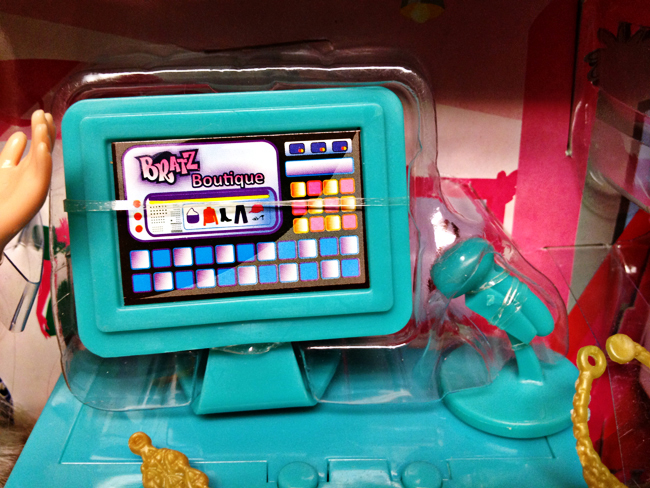
Close up of register and scanner
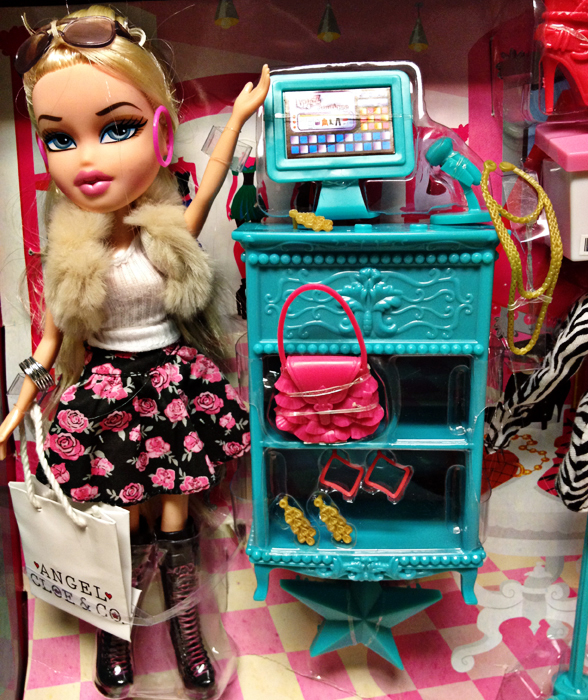
Salesperson and display unit
For the new price I say this is well worth the money. I love the backdrop and wish all sets came this way. Mattel produces some really nice backgrounds that I collect but they always have the slits and slices in them. What a wonderful idea it would be to have a clean background with every doll and set.
These are the other versions available:
MGA Image
Sasha Boo. I didn't care for the clothes or backdrop in this one and I prefer the more traditional display unit opposed to this round holed one.
MGA Image
Yasmin Chic. I wasn't feeling this one either. I don't mind the hippie dippie fashions, but maybe I do, because I didn't purchase it.
MGA Images
L.O.V.E Jade. TRU did not have the Jade Boutique so this weekend I'll go to another store to see if they have her. Because I found two versions online I'm curious to see which one is in stock. Even with the round hole display I like both of the versions. They have an Asian Gothic flavor that appeals to me.
The Boutique display items seem well made (not the jewelry, that's just crap) and I even like the little register and scanner sounds. I'm going to recommend any of these versions - assuming you get them for $9.98!